

")
Post by Roman Cimkovich, dedicated Northwest Noggin outreach participant and undergraduate in Psychology pursuing an Interdisciplinary Neuroscience minor at Portland State University.
“Neuroanatomy isn’t destiny. Neither is genetics. They don’t define who you will be. But they do define who you might be. They define who you can be.”
— Temple Grandin
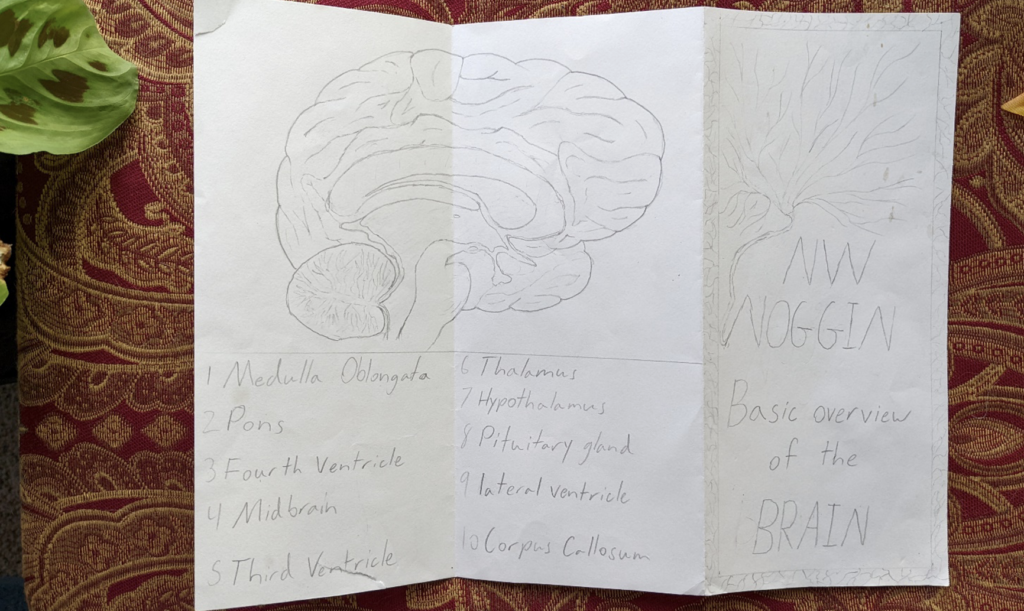
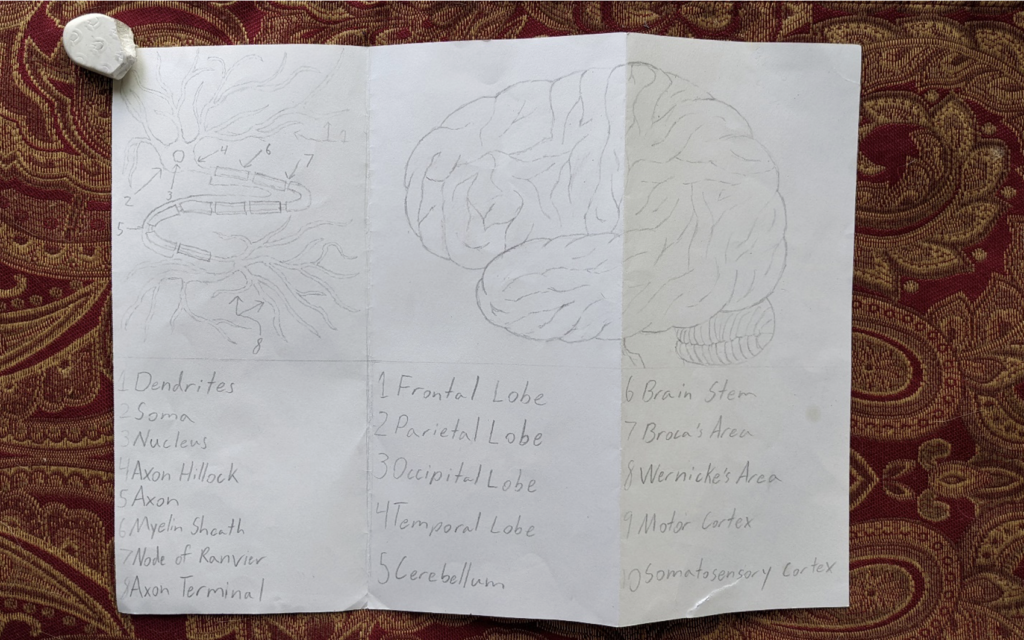
Learning about the anatomy of the brain was one of the most important and interesting aspects of both psychology and neuroscience. But one thing always felt a little off about the learning process – a lack of a clear, distinct diagram to use as a resource. All over the internet you can find many different websites, diagrams, books, videos, and other resources that provide you with some form of representation of the brain, but they never felt quite right for what I wanted and needed. I wanted a colorful and simple design that described each section of the brain in accessible terms which I could always reference, and share with K-12 students and other people we met during outreach. So, I decided to make my own.
LEARN MORE: Learning from text with diagrams: Promoting mental model development and inference generation
LEARN MORE: The simplicity principle in human concept learning
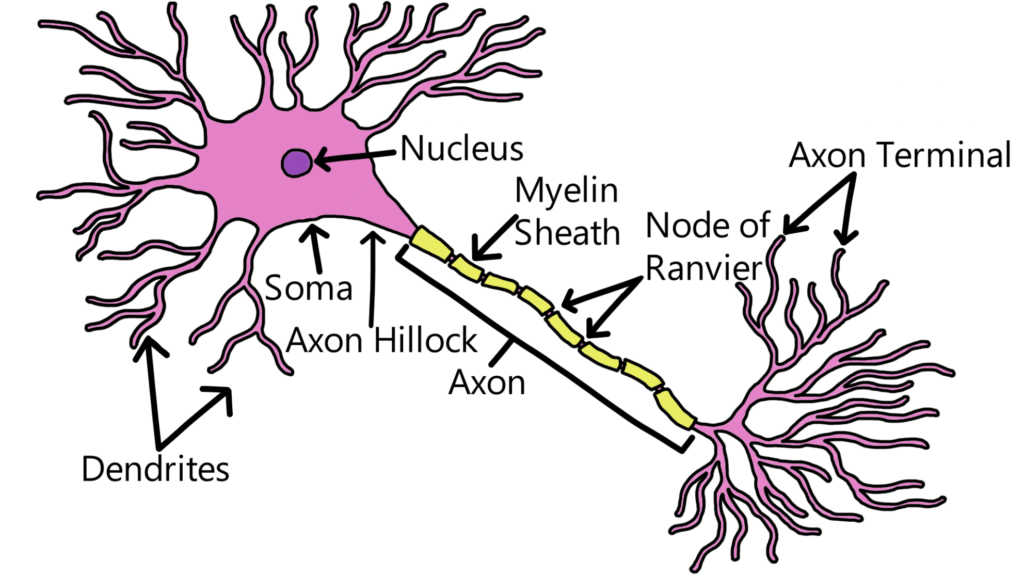
The process of creating the brochure honestly started way before I even met Bill Griesar and Jeff Leake from Northwest Noggin, probably around 2018 when I started doodling brains and brain cells.
“Drawing is an exercise for a restless imagination.”
— Tim Burton
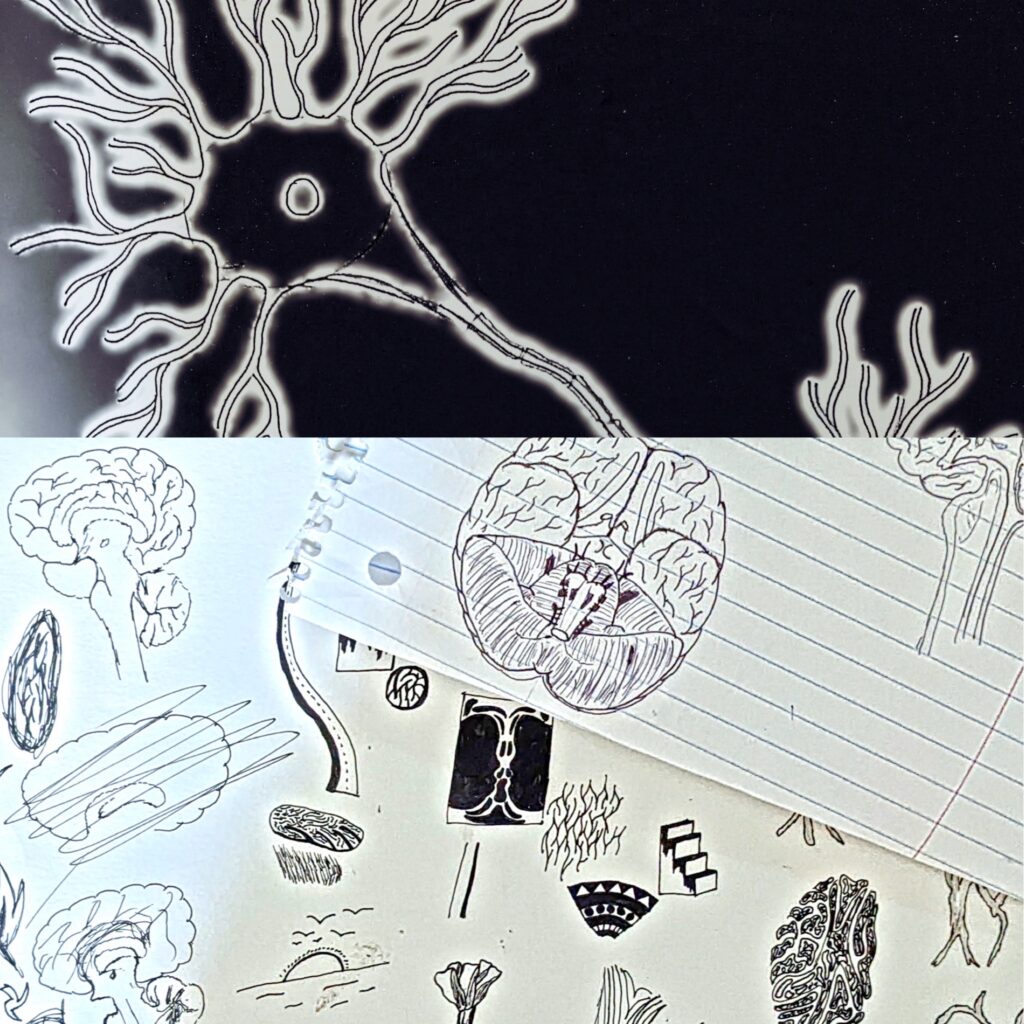
Be it on the bus, the train, during lunch, at the beach, or when I had any free time at all, something about the shape of the brain just captured my imagination and I started practicing its design. This constant practice also helped me to memorize the anatomy of the brain and the functions of its many parts, for what is a better teacher than repetition – and art!
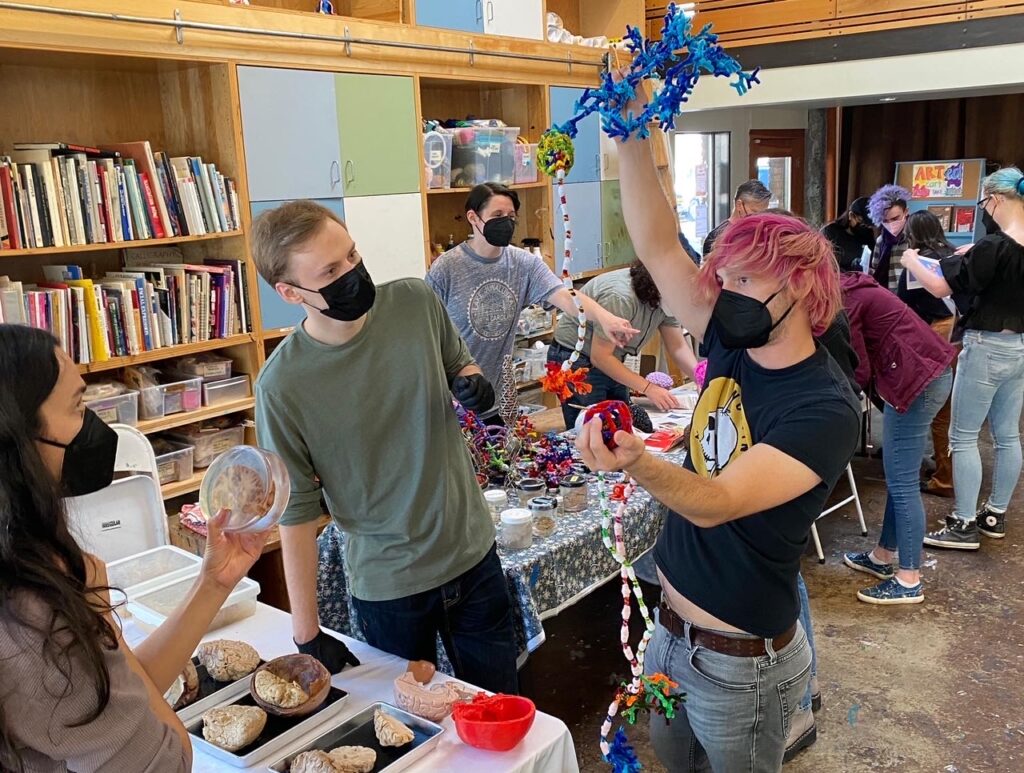
Once I started taking Bill and Jeff’s classes in interdisciplinary neuroscience it further fueled my creative interests and pursuits – especially when they asked me to make neurons out of household objects as part of a found object brain cell project.

LEARN MORE: Found Object Brain Cells
I decided to use virtual reality (VR) art and Claymation.
LEARN MORE: Tilt Brush by Google
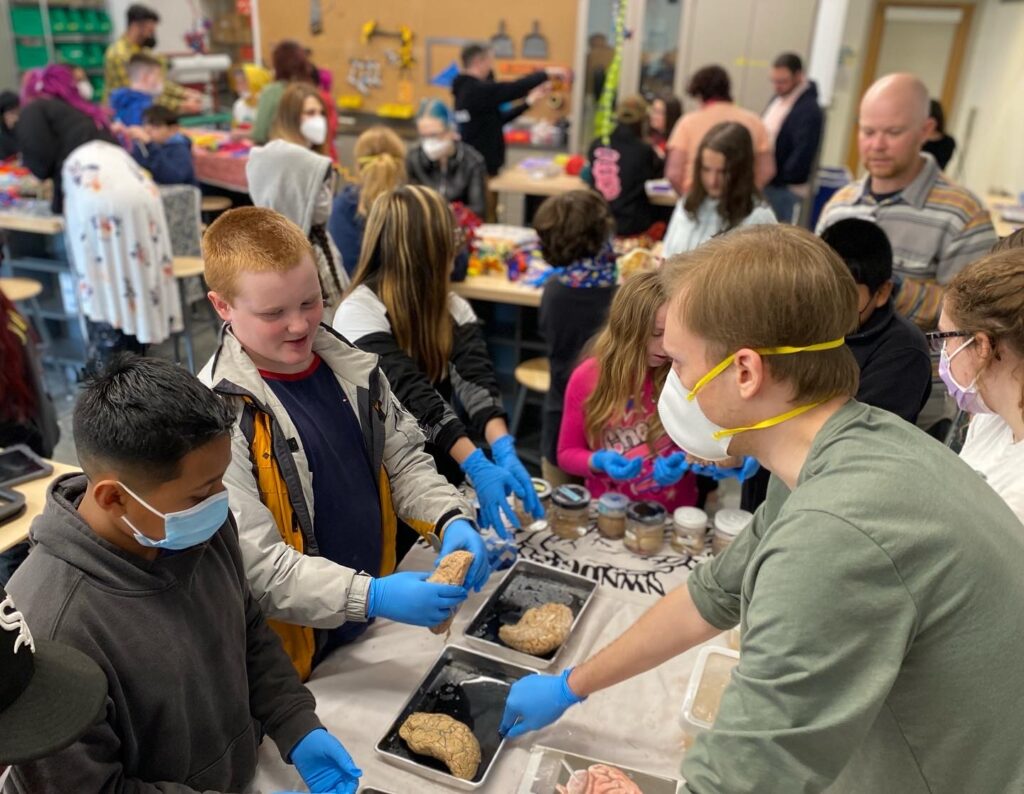
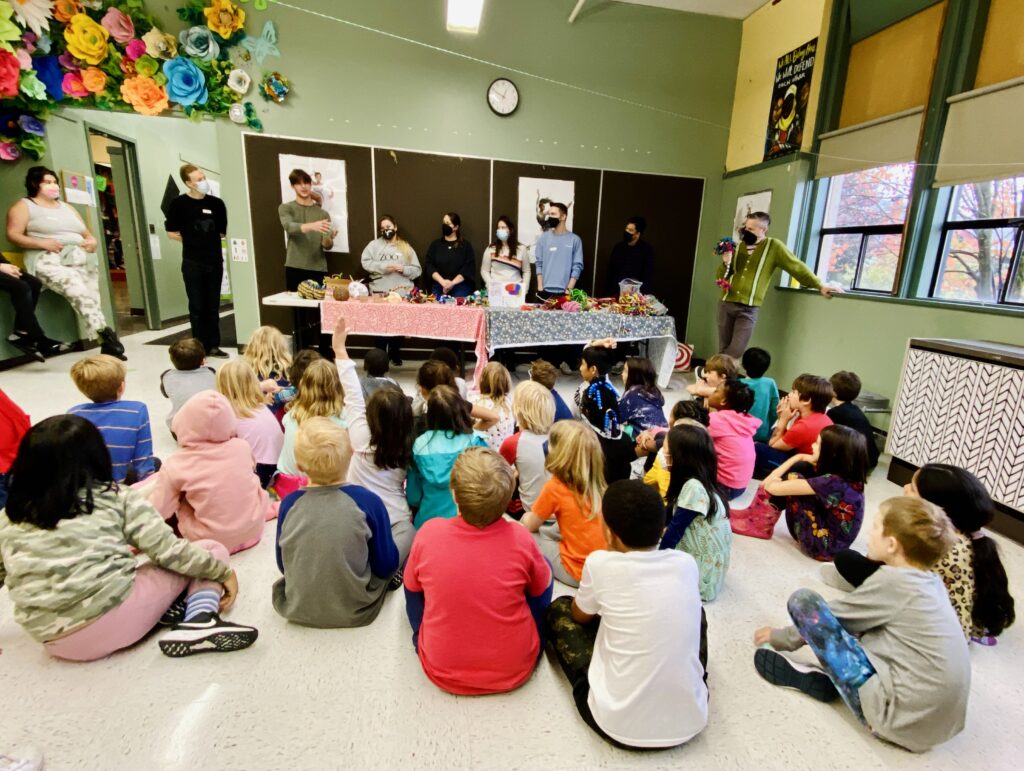
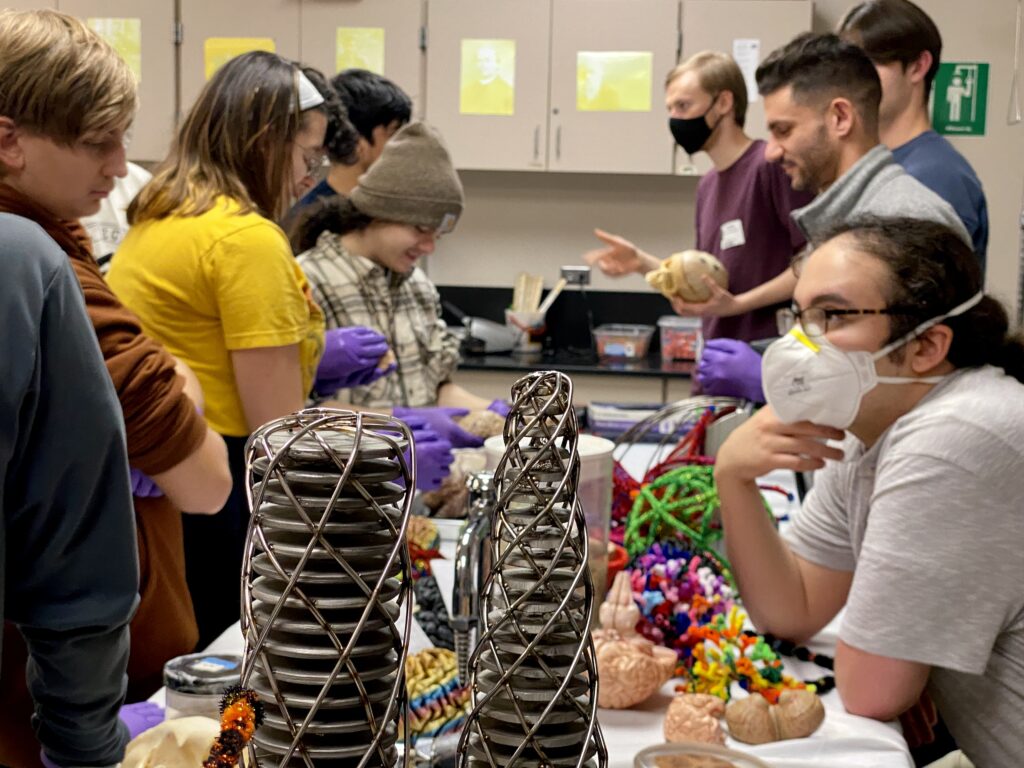
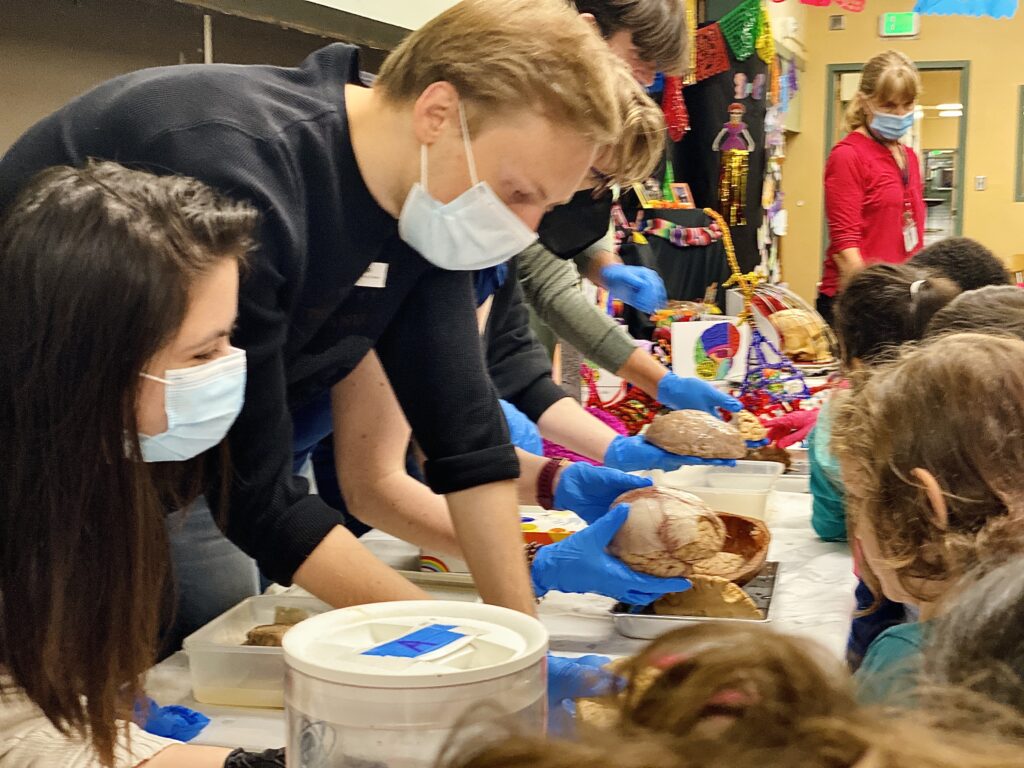
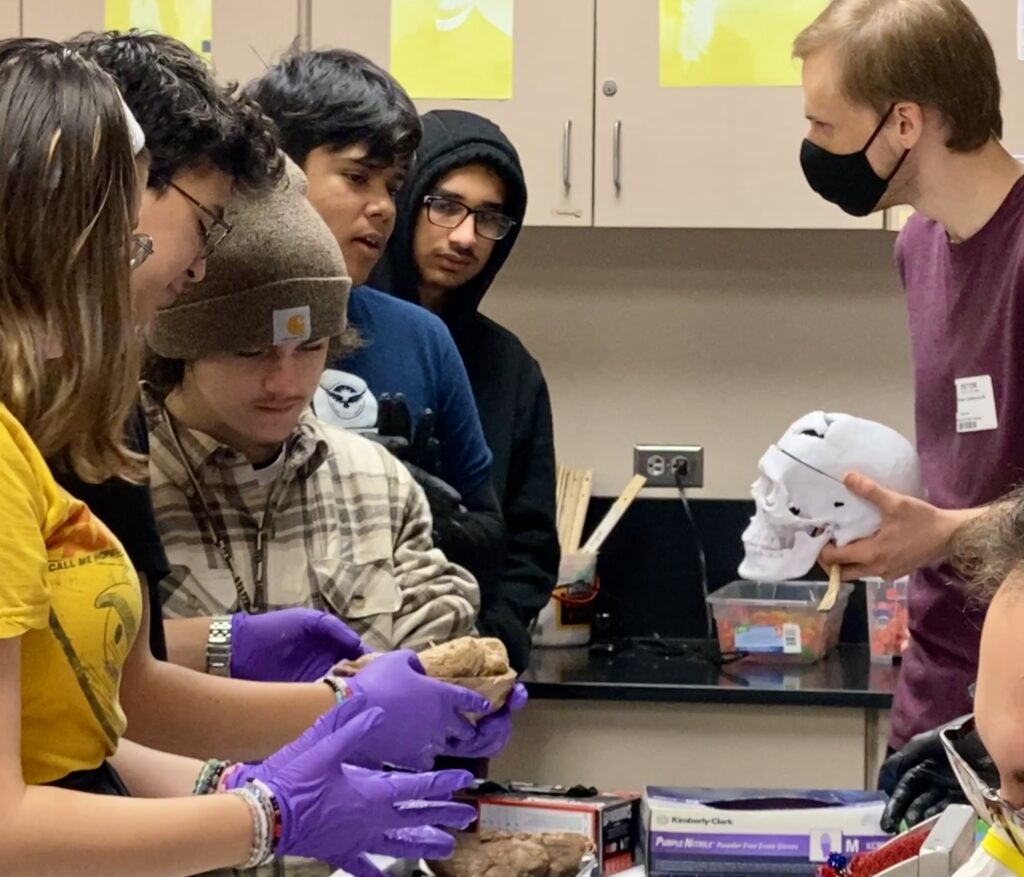
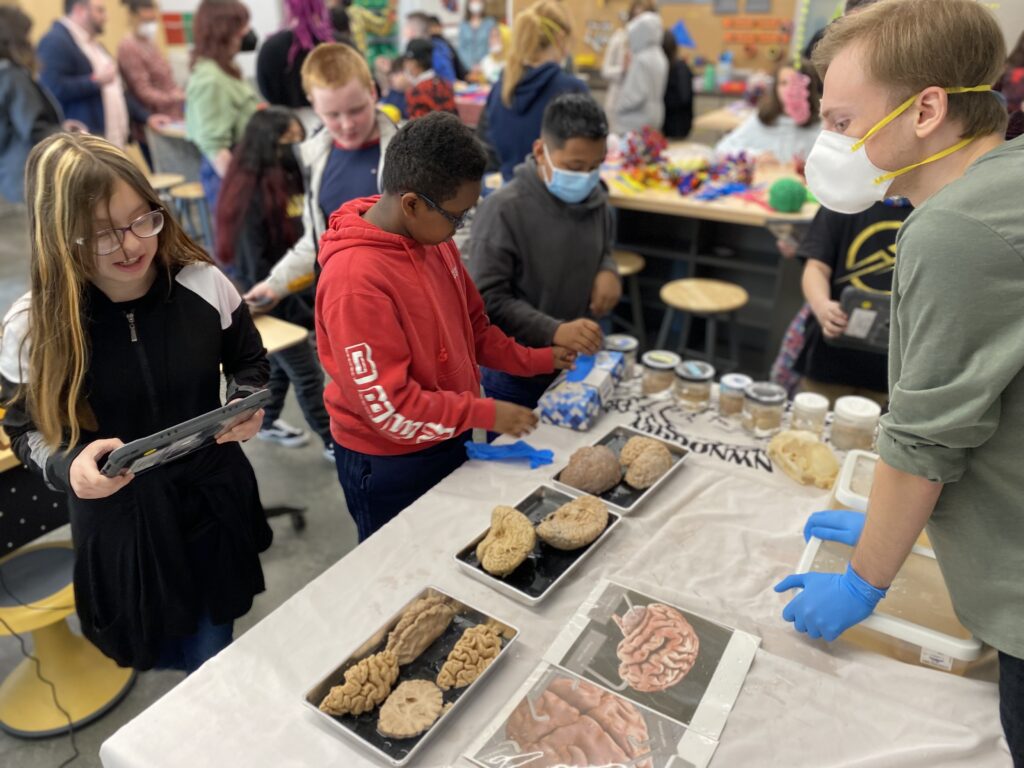
After I started doing more outreach, I saw how many kids enjoyed touching the brain and heard all of their fantastic questions. But I also noticed that we didn’t have any easily accessible visual diagram for the volunteers, students or teachers to reference. This led to more questions from people about what each brain region does and what each part is called, often while holding they were holding the brain, poking and prodding it. Sometimes my fellow volunteers and I just froze as we attempted to recall brain anatomy, as if being put on the spot made all that information vanish from our minds!
Then it clicked for me!
Why don’t we create a diagram of the brain that people could look at and point to as a reference?
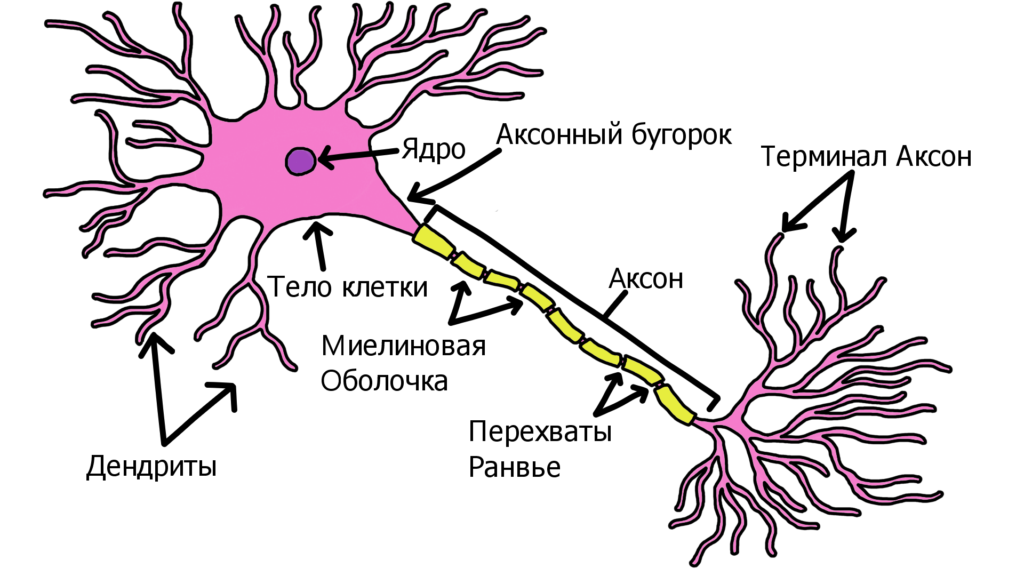
So, I made a few images of the brain and neuron labeled in both English and Russian.
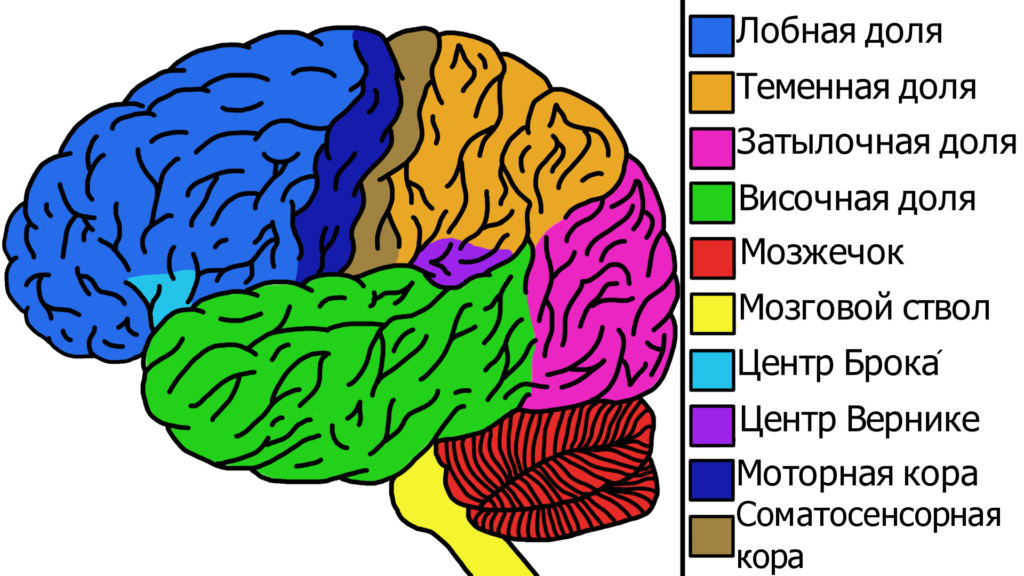
But this pushed me to think more. Why not create a brochure, I thought, that people could take home and share with their families? So taking my previous experience in art I got to work.
LEARN MORE: The use of visuals in undergraduate neuroscience education: Recommendations for educators
Creating a Noggin Brochure
Starting the brochure was easy as inspiration took hold and I spent a few days drawing what I hoped would be an amazing design. My previous experience helped me develop an idea of what I wanted and though I’m proud of the initial drawings, I knew that I had a long way to go. The brochure stalled for a bit, as I didn’t have the proper tools, or at least the tools that could help speed up the process.
“Drawing takes time. A line has time in it.”
— David Hockney
Finally I took the draft, scanned it, and then popped it over to Krita, a great free art program that I couldn’t recommend more. Though it might not provide as many options as something like Adobe Photoshop, it does a great job at providing much of what you might need for art; plus, it’s free.
I placed the draft onto a 1920×1080 canvas (which was a mistake I will discuss later) and started the process of slowly copying the draft onto the program by mouse. This ended up giving me a great view of what I had and also what might be improved visually.
I then created a second layer from which I could expand and stretch the brain, because on the draft it felt a bit too squished. After redrawing the brain quite a few times I got to a shape that I was pretty happy with – but then I noticed a new problem.
How many parts of the brain should I represent?
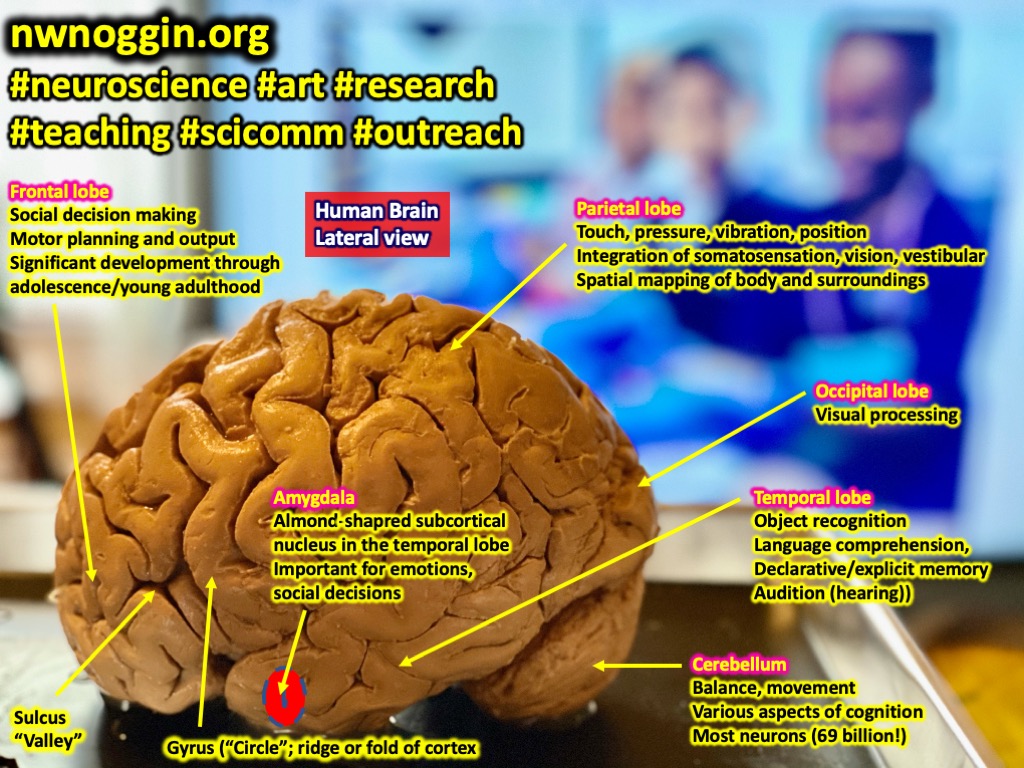
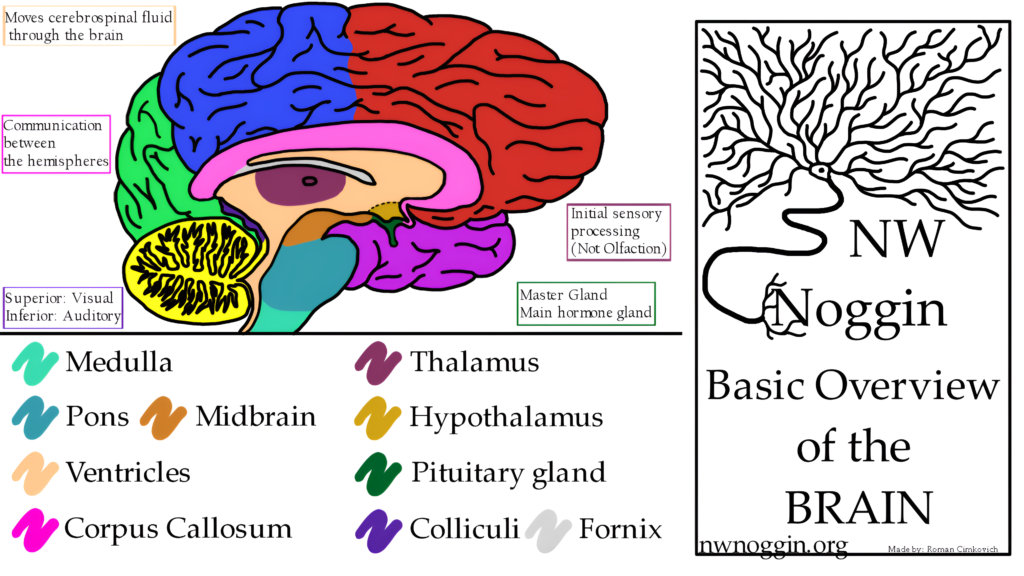
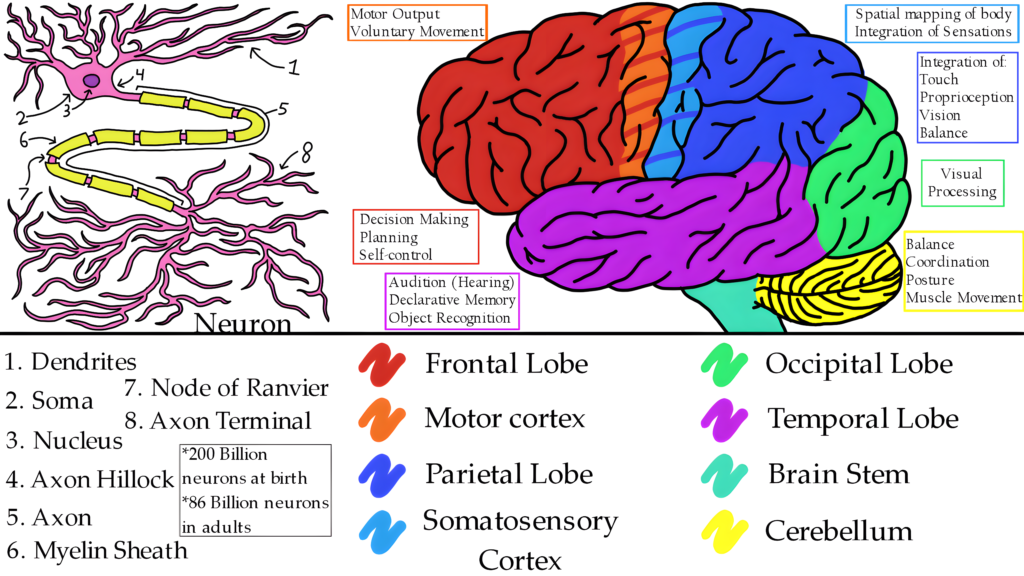
Though I originally had ten items for each side (and wanted to add more) I soon realized that I would quickly run out of space, and it would cause the brochure to feel cluttered, alongside possible making it less legible in the long run. So, after looking at a few basic introductions to neuroanatomy I chose what I thought were some of the most important parts of the brain. Though in all honesty I was pretty happy with my neuron drawing, and only made a few minor changes there.
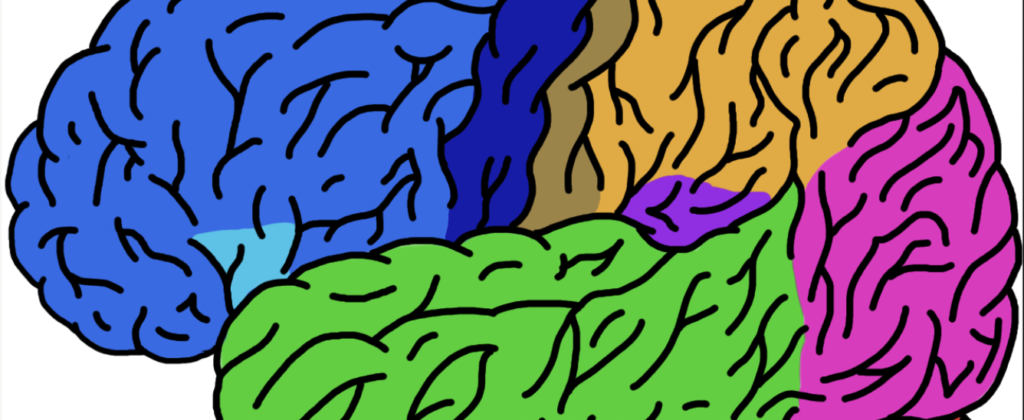
And while I could have kept working on the project with a mouse I was (thankfully!) able to get a drawing tablet which not only inspired me to continue but noticeably sped up my work. After the base outline was done, I moved to color which was the hardest part of this whole project.
I love color, but no matter how much I mixed and matched shades my brain always told me that something wasn’t right, so it took me a long time to find a good palette. Another problem was finding enough colors as I’d chosen 18 different brain and neuron parts! Though someone else might easily find 18 great colors that both contrast and complement each other, I learned that I’m really not that guy.
LEARN MORE: A common neural substrate for perceiving and knowing about color
Finally, we come to what I foreshadowed earlier about the size I chose; 1920×1080. Though it’s high resolution it turns out these are not easy to print dimensions for a brochure. Most printing shops offered brochures from 11”x 8.5” to 17”x 11”, none of which were wide enough to accommodate my work. After much time and help I was able to print at 9”x 16”, which wasn’t ideal but still allowed me to adjust and upscale my image to fit the space. So, if anyone here decides to work on a brochure, definitely do your homework and make sure that you know which resolution works best for printing your project.
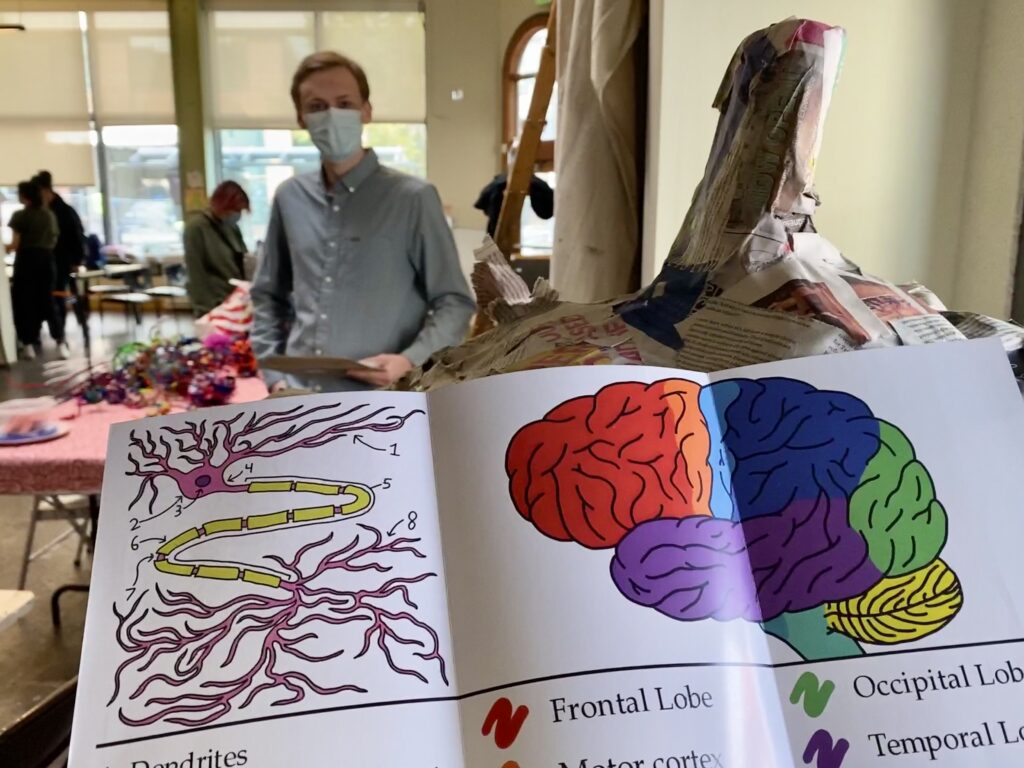
After printing, I brought the first edition of the brochure to outreach at p:ear, an amazing place that provides food, shelter, and art to people in critical situations. Everyone seemed to enjoy what I had made, and it was even used as a template for the papier-mâché brain we made! Overall, I was very happy but I knew there was still room for improvement and got some very important insight into what could be changed from Bill and the other Noggin volunteers.

LEARN MORE: Papier-Mâché: Shaping Our Brain
LEARN MORE: NW Noggin @ p:ear
I made these changes and also added small description boxes to provide a basic idea of what each particular part of the brain does, but it’s important to remember that the brain is a multifaceted organ. Each region communicates with others and no one part of the brain has a singular job. Check it out below: there’s a Dropbox link with art I made plus the brochures which anyone can print at home!
Enjoy, make art and share noggins! Let knowledge serve 🙂
LEARN MORE: The multifaceted abstract brain
BRAIN ART DROP BOX: NW Noggin Brain Art: Made by Roman Cimkovich